
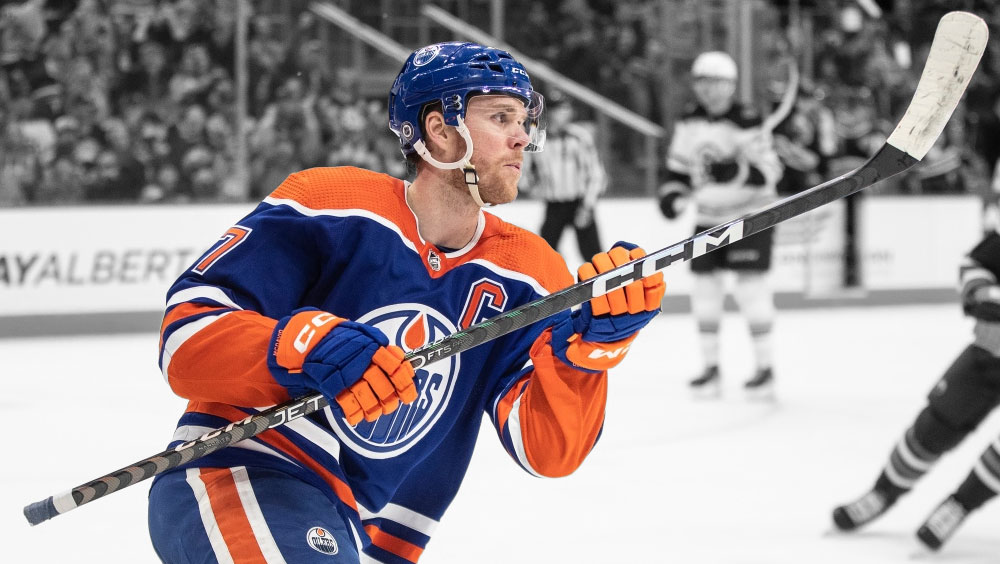
Taping a hockey stick correctly is a skill that can significantly impact your performance on the ice. In this comprehensive guide, we will walk you through the step-by-step process of taping a hockey stick, from gathering the necessary materials to customizing your tape job for optimal puck control. Whether you're a seasoned player or just starting in the game, this article aims to provide you with the knowledge and techniques needed to tape your hockey stick like a pro.

Preparing for Taping
Gather Necessary Materials
Before you begin taping your hockey stick, it's crucial to have all the necessary materials on hand. Each of these materials plays a specific role in achieving a successful tape job:
- Hockey Tape (Cloth or Grip Tape): Hockey tape is the primary material used for taping a hockey stick. It comes in two main types: cloth tape and grip tape. Cloth tape is commonly used for taping the blade, while grip tape is ideal for the handle. Cloth tape provides friction for better puck control and shooting, while grip tape ensures a secure hold on the stick.
- Scissors: Scissors are essential for cutting the tape to the desired length. They allow you to trim the tape precisely, ensuring a neat and effective tape job.
- Clean Surface: Having a clean and dry surface to work on is essential for two reasons. First, it prevents any dirt or debris from getting trapped under the tape, which could affect adhesion. Second, a clean surface allows you to focus on the taping process without distractions.
Having these materials ready before you start taping ensures that you won't have to interrupt the process to search for missing items. It also helps maintain the quality of your tape job by ensuring that you have the right materials for each part of the stick.
Stick Cleanliness
Starting with a clean hockey stick is paramount for achieving a successful tape job. Not only does it ensure proper adhesion of the new tape, but it also contributes to the overall longevity of your stick. Here's a comprehensive guide on how to prepare your stick for taping:
- Removing Old Tape:
- Peel Off Old Tape: Begin by carefully peeling off any old tape that may be on the blade or handle of your stick. Use your fingers to gently lift the edges of the tape and pull it away. Be patient to avoid damaging the stick's surface.
- Residue Removal: Over time, adhesive residue from previous tape job can accumulate on your stick. To remove this residue, you can use a few different methods:
- Rubbing Alcohol: Dip a paper towel or clean cloth in isopropyl alcohol and use it to remove residue. This should help dissolve and lift the adhesive.
- Adhesive Remover: There are specific adhesive removers available that are safe for use on hockey sticks. Follow the product instructions for best results.
- Warm Soapy Water: If you don't have rubbing alcohol or adhesive remover on hand, warm soapy water can also work. Use a mild soap and a soft cloth to scrub away the residue, then rinse and dry the stick thoroughly.
- Scrape Stubborn Bits: For stubborn bits of residue, you can use a plastic blade scraper or even your fingernails. Be cautious not to damage the stick's surface in the process.
- Inspect the Stick: After removing the old tape and residue, inspect the stick's surface for any remaining traces. It's essential to ensure that the stick is entirely clean before proceeding with the taping process.
By starting with a clean and residue-free stick, you set the stage for optimal tape adhesion. A clean surface allows the tape to bond securely, preventing it from peeling or slipping during play. Additionally, maintaining stick cleanliness over time will help extend the life of your hockey stick, ensuring it remains in top condition for many games to come.
Taping Techniques
Blade Taping
Taping the blade of your hockey stick is a critical aspect of the taping process. A well-taped blade enhances puck control, accuracy in shooting and passing, and provides protection to the blade's surface. Here's a detailed guide on how to tape the blade effectively:
- Starting at the Toe:
- Begin at the toe of the blade. This is where your tape job will initiate.
- Make sure the tape adheres securely to the blade's surface. A loose start can lead to an uneven tape job.
- Overlapping Layers:
- Apply the tape in overlapping layers as you move toward the heel of the blade. Overlapping ensures uniform coverage and durability.
- While overlapping, ensure that each layer of tape is pressed firmly against the blade. This ensures a secure bond.
- The degree of overlap depends on personal preference but typically ranges from a slight overlap to about a quarter of an inch. Experiment with different overlaps to find what feels best for you.
- Angle of the Tape:
- Pay close attention to the angle at which you apply the tape. It should follow the curve of the blade. This not only provides uniform coverage but also enhances the feel of the puck on your stick.
- Avoid taping the blade too flat or too convex. Find the right balance by keeping the tape at a slight angle that matches the blade's curve.
- Finishing the Blade:
- Once you reach the heel of the blade, ensure the tape is securely fastened.
- You can finish the blade in different ways: some players prefer to wrap the tape around the back of the blade, while others simply cut it off flush with the heel. Both methods are acceptable; choose the one that feels more comfortable for you.

Handle Taping
A well-taped handle enhances your control over the stick and allows for a better connection between you and the puck. Here's a comprehensive guide on how to tape the handle effectively:
- Grip Thickness:
- Determine your preferred grip thickness. This is a matter of personal preference, and different players have different preferences.
- To achieve a thicker grip, apply more layers of tape. For a thinner grip, use fewer layers. Experiment to find what feels most comfortable and effective for your playing style.
- Hand Placement:
- Position your hands on the stick in a way that feels comfortable and natural to you. Your top hand's placement is particularly important, as it influences your stick-handling and shooting.
- Starting the Handle Tape:
- Begin taping the handle by wrapping the tape around the top of the handle where your top hand will grip the stick. Make sure the tape adheres securely.
- You can start with an anchor point by taping a few inches down from the top and then working your way up. This helps ensure a secure starting point.
- Overlapping Layers:
- Apply the tape in overlapping layers as you move down the handle. Overlapping provides durability and prevents the tape from unraveling during play.
- While overlapping, press each layer firmly against the handle to ensure a tight bond.
- Keep the tape snug but not overly tight. Excessive tension can lead to discomfort during play.
- Hand Placement Markings:
- Some players like to mark their preferred hand placements on the tape job. You can use a different color tape or make notches to indicate where your hands should go.
- Variations in Handle Taping:
- Handle taping can vary based on player preferences. Some players prefer a uniform thickness throughout, while others create a gradual taper from thick to thin.
- You can experiment with different tape patterns and thicknesses to find what works best for your grip and control.
- Finishing the Handle:
- Once you've achieved the desired grip thickness and reached the end of the handle, secure the tape by wrapping it around the handle or creating an end knot.
- An end knot involves folding the end of the tape over and taping it down securely to prevent unraveling.
Special Taping Considerations
Knob Taping
Taping a knob at the top of your hockey stick serves multiple purposes, including better control, comfort, and customization. A well-taped knob can significantly enhance your overall performance on the ice. Here's a detailed guide on how to tape a knob effectively:
- The Importance of a Knob:
- A knob provides a larger, more comfortable surface for your top hand to grip. It enhances control during stick handling, shooting, and passing.
- Additionally, a properly taped knob prevents your top hand from slipping up the stick during intense moments of play.
- Materials Needed:
- For taping a knob, you'll need the same hockey tape you used for the blade and handle taping, as well as a pair of scissors.
- Taping the Knob:
- Start by deciding how thick you want your knob to be. This depends on personal preference, but a knob thickness of approximately 1 to 1.5 inches is a common choice.
- To begin taping the knob:
- Wrap the tape around the top of the handle, just above where your top hand will rest.
- Ensure the tape adheres securely and doesn't slip during play.
- Creating the Knob:
- To build the knob, continue wrapping the tape around the handle, gradually building up the thickness.
- Pull the tape taut to ensure a snug fit, but avoid excessive tension that might make the knob uncomfortable to grip.
- As you build the knob, use your fingers to shape it into a rounded or oval shape, whichever feels most comfortable in your hand.
- Maintain uniformity in the knob's thickness to create a symmetrical grip.
- Securing the Knob:
- Once you've achieved the desired knob thickness and shape, secure the tape by folding the end over and wrapping it around the knob a few times.
- Use scissors to trim any excess tape, leaving a neat and secure finish.
- Testing the Knob:
- Before hitting the ice, take a few practice shots and stick handle to ensure the knob feels comfortable and secure in your hand.
- Make any final adjustments if needed to achieve the perfect knob for your playing style.
A well-taped knob not only enhances your grip and control but also adds a personalized touch to your stick. Don't hesitate to experiment with knob thickness and shape to find what works best for you. The knob is a critical element of your stick setup, and tailoring it to your preferences can make a significant difference in your performance on the ice.
Custom Designs and Patterns
Custom designs and patterns on your stick not only make it uniquely yours but can also be visually striking. Here are some ideas and tips to inspire your creativity rather than using black or white tape:
- Team Colors and Logos:
- Showcase your team pride by incorporating your team's colors and logo into your tape job. You can create stripes, checkerboard patterns, or even spell out your team's name or initials with colored tape.
- Number or Initials:
- Personalize your stick by adding your jersey number or your initials using colored tape. This not only adds a personal touch but can also help you identify your stick in a crowded locker room.
- Traditional Stripes:
- Classic stripes are always in style. Create clean and symmetrical stripes along the blade or handle using tape of contrasting colors. This timeless design not only looks great but also helps with alignment.
- Checkerboard or Diamonds:
- Checkerboard or diamond patterns can add a bold and dynamic look to your stick. Alternate between two contrasting colors to achieve this striking effect.
- Camouflage or Digital Camo:
- If you want a rugged and unique look, consider a camouflage or digital camouflage pattern. This can give your stick an edgy appearance that stands out on the ice.
- Signature Taping Style:
- Develop your signature taping style that sets you apart from other players. Whether it's a specific way you wrap the knob or a unique blade pattern, having a distinctive look can be your trademark on the ice.
- Tape Artistry:
- Get creative by using different colors and types of tape to create intricate designs. You can weave, crisscross, or layer tape to craft visually appealing patterns that catch the eye.
- Holiday Themes:
- Celebrate the holidays or special occasions by incorporating themed tape designs. For example, you can create a festive tape job for Christmas or Halloween.
- Glow-in-the-Dark Tape:
- Consider using glow-in-the-dark tape for a unique and fun twist. This can add an element of surprise to your stick's appearance, especially in low-light conditions.
- Changing It Up:
- Don't be afraid to change your tape job periodically. Experiment with different designs, patterns, and colors to keep things fresh and exciting.
Maintenance and Care
Maintaining the Tape Job
- Regular Inspections:
- Before each game or practice session, take a moment to inspect your tape job. Look for signs of wear, peeling, or loose ends.
- Address any issues promptly to prevent them from worsening during play.
- Re-Taping Frequency:
- How often you should re-tape your stick depends on your playing frequency and the condition of your tape. Most players prefer to re-tape their sticks before every game.
- However, you can adjust the frequency based on your preference and the condition of the tape. Some players re-tape more frequently if they notice wear or a decrease in grip.
- Replacing Damaged Sections:
- If you spot any severely damaged or frayed sections of tape, don't hesitate to replace them. Damaged tape can affect your grip and control.
- Wax for Grip:
- Applying hockey stick wax to your tape job can enhance grip and puck control. Rub the wax over the tape surface and use a cloth to spread it evenly.
- Wax also helps prevent snow and ice buildup on the blade during games played in colder conditions.
Stick Longevity
Proper taping and maintenance practices not only enhance your on-ice performance but also contribute significantly to extending the life of your hockey stick. Here's why these practices are crucial:
- Protection from Wear and Tear:
- One of the primary functions of tape on a hockey stick is to protect it from the wear and tear of gameplay. Properly taped blades shield the stick from contact with the ice, boards, and other sticks, preventing nicks, scratches, and structural damage.
- Tape on the handle improves grip and control, reducing the likelihood of losing your stick during play. This protection ensures that your stick remains structurally sound over time.
- Prevention of Moisture Damage:
- Hockey sticks are exposed to a variety of environmental conditions, including damp locker rooms and ice surfaces. Properly taped handles help protect the stick from moisture absorption, which can lead to warping and degradation of stick materials.
- Regular inspections and maintenance allow you to identify and address any signs of moisture damage promptly.
- Cost-Effectiveness:
- Good tape job practices are highly cost-effective in the long run. Regularly re-taping your stick and maintaining it can extend its lifespan significantly.
- The cost of tape and occasional waxing is minimal compared to the expense of frequently replacing your hockey stick due to neglect or damage.
Conclusion
Wrapping tape on a hockey stick is not just a routine; it's an art that can elevate your game. By following the steps and techniques outlined in this guide, you can master the art of taping your hockey stick effectively. Remember, practice makes perfect, so don't hesitate to experiment with different grip thicknesses, patterns, and tape types to find what suits you best.
Frequently Asked Questions:
How often should I re-tape my hockey stick?
Typically, players re-tape their sticks before every game or practice session. However, the frequency may vary based on personal preference.
What type of tape is best for taping a hockey stick?
Cloth tape and grip tape are the most commonly used types for taping hockey sticks. Cloth tape is often used for blade taping, while grip tape is ideal for the handle.
Can I use colored tape for taping my stick blade?
Yes, you can use colored tape to personalize your stick. Just ensure it adheres well and doesn't affect your puck control.
Should I wax my stick tape for better puck control?
Waxing your stick tape can help improve puck control and prevent snow buildup on the blade. It's a matter of personal preference.
What are some common mistakes to avoid when taping a hockey stick?
Common mistakes include uneven taping, insufficient layers, and neglecting maintenance. Make sure to follow the guidelines outlined in this article to avoid these issues.